With a move to remote working as a result of the COVID-19 pandemic, organisations are looking for solutions that can streamline the experience. Some of the challenges of remote working often start with having the appropriate end user device. It might be a corporate managed laptop but equally it might be an uncontrolled personal device. Can a virtual desktop help?
With end devices, what software is installed? Have you installed anti-malware software? When was it last updated? All up, there are several considerations to ponder.
If your teams are using a VPN to join the network, you need to care about the state of that device. After all, what is that device now exposing to your corporate network? Consider how you can allow access? Can you provide access to services such as email without a VPN? Perhaps you can provide access through secure public endpoints instead?
Don’t forget the problem of people leaving business data on endpoints. It’s hardly exclusive to remote working but with more people doing it there are more opportunities for data leakage. Consider using corporate file stores, such as Google Drive or Microsoft OneDrive.
If you really want to provide the corporate experience without the hardware, a virtual desktop may be a solution for you.
Amazon Workspaces
Cloud hosted solutions such as Amazon Workspaces negate the need for expensive hardware and software purchases. They give you control back of the desktop and your business data. In fact, right now, AWS is offering the use of up to 50 Workspaces for free for the next three months (through until 30th June 2020).
Amazon Workspaces provides a highly scalable Windows or Linux desktop, purchased on demand as with other AWS services. It supports integration into AD, including to an on-premises or Azure AD directory.
How do I get started?
At RedBear, we automate the WorkSpace deployment so that it is easier for end users to create a WorkSpace for themselves. We will step you through the solution with the following architecture in mind. In this solution, we are using Azure AD as the identity provider.
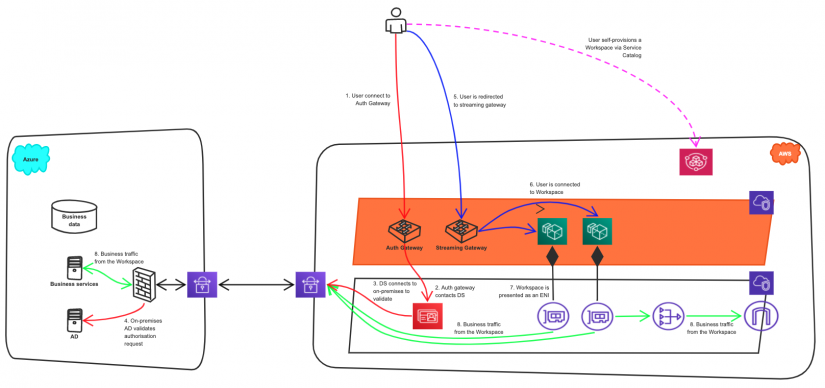
The solution uses the following AWS components:
- AWS site-to-site VPN to connect to Azure;
- Amazon Workspaces to provide the desktop experience;
- AWS Directory Service AD Connector to provide a proxy to Azure AD;
- AWS Service Catalog for self-service provisioning of desktops.
We are fans of automation and everything as code so we have developed several CloudFormation templates that will setup all the AWS services for the Amazon Workspaces virtual desktop solution. For this blog we will concentrate on setting up the solution. In a follow up, we will cover the add-on Service Catalog component.
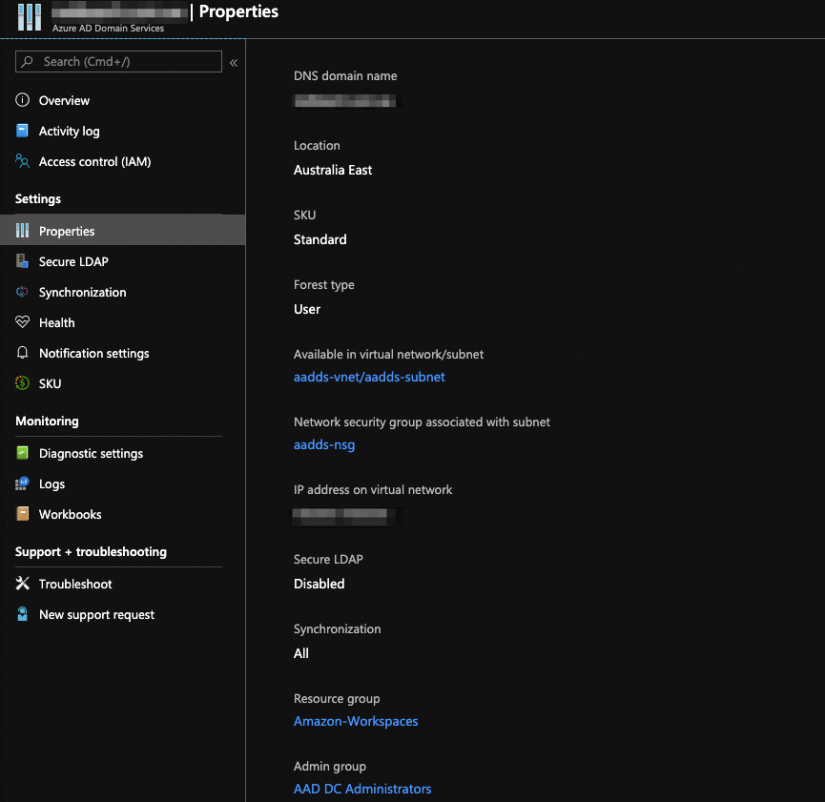
Create a Azure AD Domain Services instance
In order to allow actions such as domain join and group policy, a Domain Services instance is required. If you don’t already have one setup, create the instance by using the procedure at Create an Azure AD Domain Services instance.. This will create the virtual network which we will use in the next step.
Setting up the VPN in Azure
First of all, a VPN needs to be created between AWS and Azure. Log in to your Azure console and use the following steps.
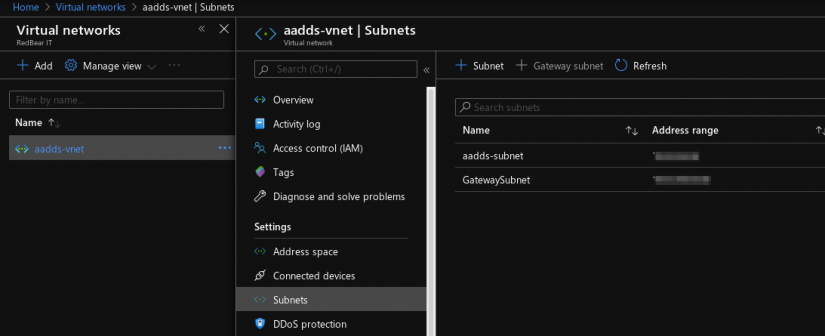
- Check the virtual network and make a note of the IP addresses of the network interfaces.

- Create a Gateway Subnet in Azure. On the Virtual Network page from the step above, select the Subnets tab and click +Gateway Subnet.
- Create a public IP.
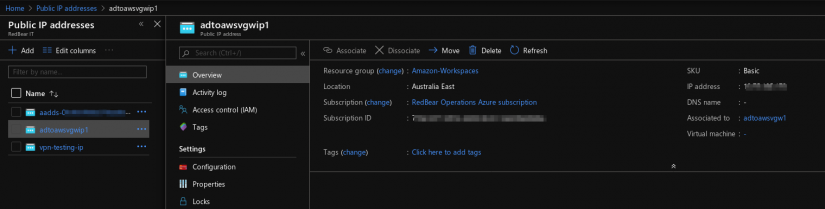
- Create a Virtual Network Gateway.

Setting up the VPN in AWS
It’s time to now switch to the AWS console and create the AWS end of the VPN.
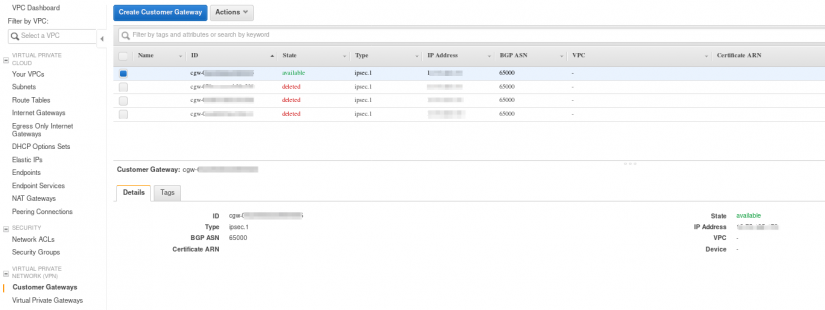
- Create the customer gateway, using the public IP created in Azure.
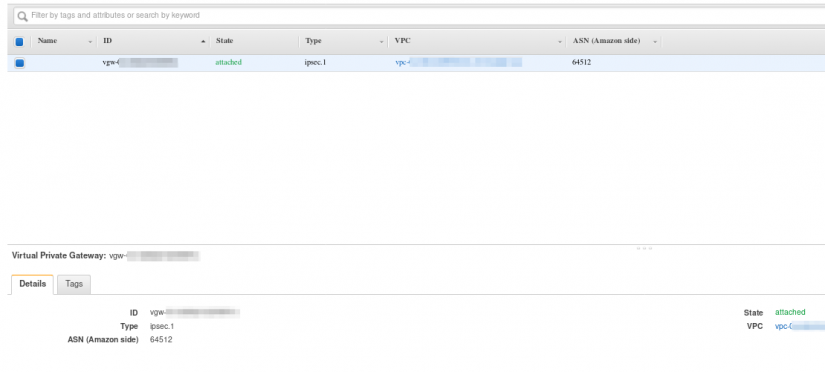
- Enable a new Virtual Private Gateway.
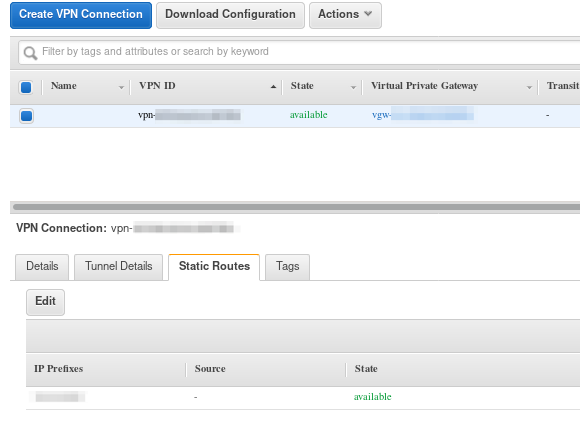
- Create a site-to-Site VPN connection.
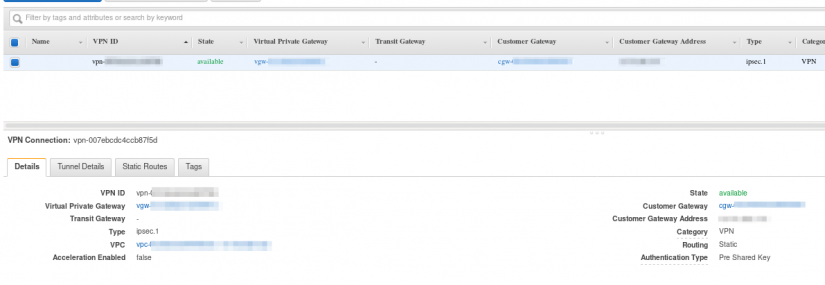
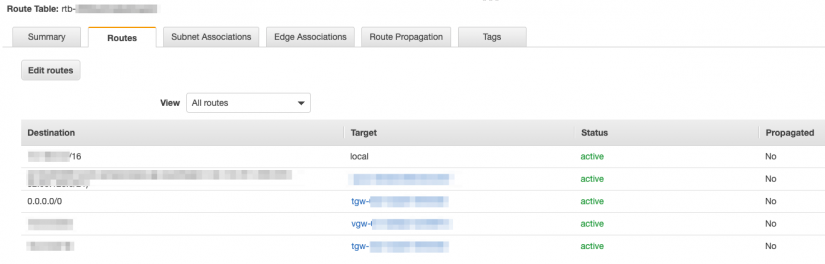
- In the Static Routes tab, add the Azure subnet.
- Add a route to the Azure subnet via the virtual gateway created above. The route should be added to the appropriate route table(s).
Download the VPN configuration file and retrieve the following details from the configuration file.
- IPSec Tunnel #1:
- Pre-Shared Key
- Outside IP Addresses → Virtual Private Gateway
- IPSec Tunnel #2:
- Pre-Shared Key
- Outside IP Addresses → Virtual Private Gateway
Finalising the VPN
Switch back to Azure to finalise the VPN configuration.
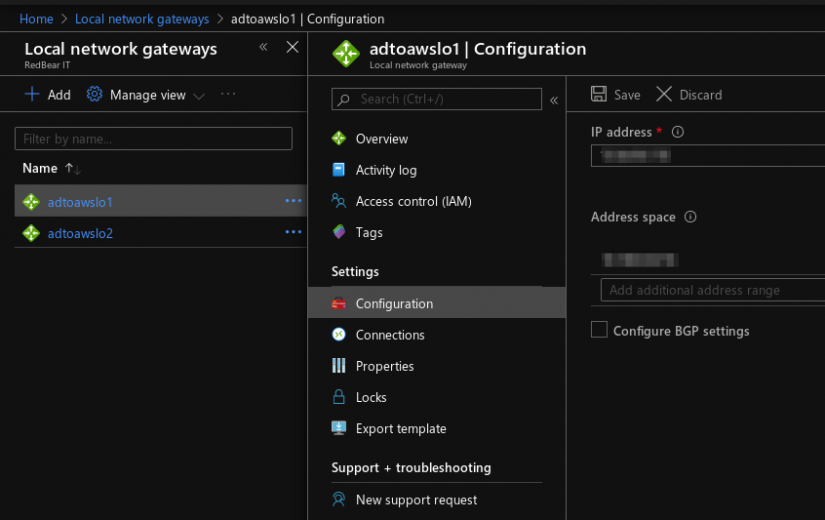
- Create Local Network Gateways. Create two local network gateways to correspond to the two VPN tunnels on AWS side. Use the IP addresses from the configuration file to create the local network gateways
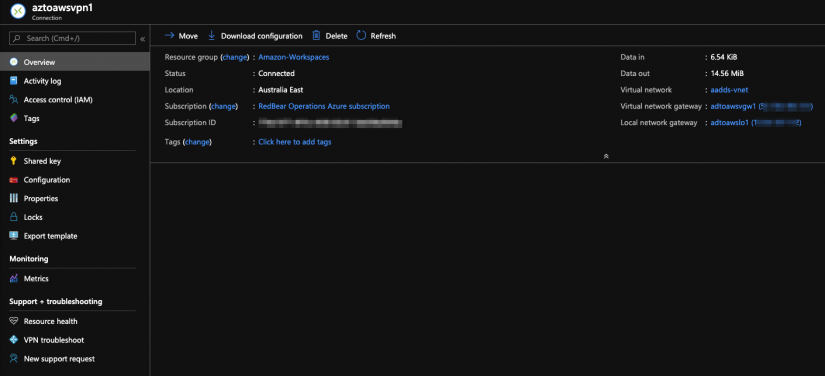
- Create VPN connections. Create two VPN connections to correspond to two VPN tunnels on AWS side. Use the pre-shared keys from the configuration file. In a few minutes the tunnel will be established.
Now that the VPN has been created, Azure AD can be configured to integrate with AWS Directory Service.
If you want, you can launch a test instance in the subnet associated with the route table(s) above. Once launched, perform a test ping to the Azure network interfaces that are the Domain Services endpoints. If that works, move on to create the connection between an AD Connector and Azure AD.
Creating an Azure AD service account
In the Azure portal, use Powershell to create a new service account. Update the parameters as required
$password = "MyExcellentPassword!"
$displayName = "Amazon WorkSpaces Service Account"
$upn = "svc_awswks@mydomain.com.au"
$mailName = "svc_awswks"

$aadAdmins = "AAD DC Administrators"
$PasswordProfile = New-Object -TypeName Microsoft.Open.AzureAD.Model.PasswordProfile
$PasswordProfile.ForceChangePasswordNextLogin = $false
$PasswordProfile.Password = $password
$newaaduser = New-AzureADUser -DisplayName $displayName -PasswordProfile $PasswordProfile -UserPrincipalName $upn -AccountEnabled $true -MailNickName $mailName Get-AzureADGroup | where {$_.displayname -like $aadAdmins} | Add-AzureADGroupMember -RefObjectId $newaaduser.ObjectId
Create a Directory Service AD Connector
The final step is now to create an AD Connector. Once this is complete, we can launch a Workspace! Switch back to the AWS Console.
- From the Workspaces service page, select Directories and click on Set up Directory.
- Select a type of AD Connector.
- Select the size required. For most organisations looking to embark on a virtual desktop solution, the small size will be sufficient.
- Specify the VPC and Subnets for the AD Connector
- Provide the following AD information:
- Organisation name – This is a unique name for the directory.
- Directory DNS Name – This is the DNS domain name from Azure.
- DNS IP addresses – Use the IP addresses from Azure network interfaces for the virtual network created above.
- Service account username – the user name for the created service account.
- Service account password – the password for the created service account.
- Once the directory has launched, register it with Workspaces.
- Select the directory and chose the Register action.
- Chose the subnets for the Workspaces and click the Register button. Other options can be configured after the initial registration.
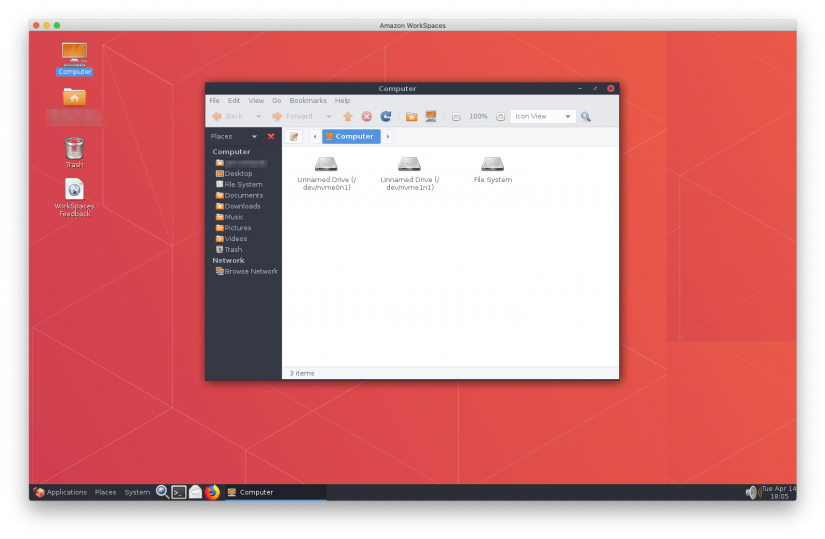
Testing a Workspace
You can now test a launch of a Workspace. Use your Azure AD username and password to access the workspace.
Making it easier!
As previously mentioned, we are fans of automation. For AWS services, we have a CloudFormation template that will automate this process which we are happy to share.
If you would like a copy and to understand more about this virtual desktop solution, please get in contact with us.
Also look out for a future post where we cover how to self service launch a Workspace using Service Catalog.